Whether it’s migrating file shares off a Windows File Server or configuring FSLogix for Azure Virtual Desktop (AVD), one of the most common questions I get is:
“Can Azure Files be configured in a fully cloud‑native way and use Cloud-only identities?”
Until recently, the answer was a dissappointing, “no”. Azure Files required identities sourced from Windows Active Directory, either by running domain controllers or by using Microsoft Entra ID Domain Services. However, that all changes now! At the time of writing, Azure Files support for Cloud-only Entra ID authentication is currently in public preview! This means no more Windows AD or Entra ID Domain Services requirement. In this post, we will walk through the steps to get a working demo up and running.
To learn more about this feature please refer to the following link: Azure Files Cloud Only Identity Support
Prerequisites and Limitations
Before getting started, remember that at the time of writing, this feature is still in public preview so capabilities and configuration steps may change before the feature reaches GA.
Current Limitations
- Available only in public Azure clouds.
- Only default share‑level permissions are supported for cloud‑only identities.
- Default share permissions apply to all authenticated users in the storage account.
- MFA is not supported when accessing Azure Files via Entra Kerberos.
Prerequisites
For this demo I have the following pre-configured resources:
- An Azure Storage account with an existing Azure Files share (SMB).
- Public network access disabled on the storage account.
- Private Endpoint configured and reachable from the client.
- A supported client OS:
- Windows 11 24H2 or later (Enterprise, Pro, single‑session, or multi‑session)
- Windows Server 2025
Configuring Entra ID Only Authentication
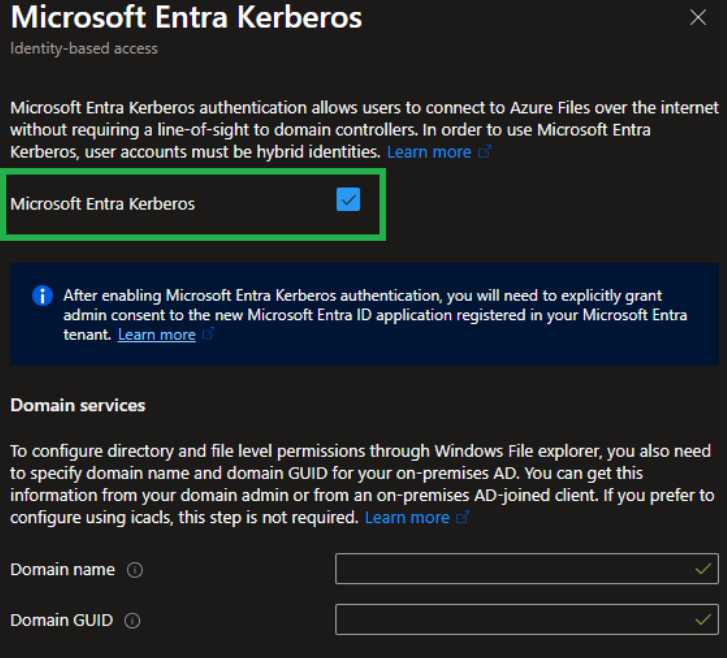
Step 1: Enable Microsoft Entra Kerberos Authentication
This step connects your storage account to Microsoft Entra ID using Kerberos. In the Azure portal, navigate to your Storage Account. In this example, I have an existing storage account named “azfilesstor” with an SMB file share called “share01”.
- Go to Data storage ➜ File shares.
- Select “Configure” next to “Identity‑based access“.

- Choose “Microsoft Entra Kerberos” as the identity source.
- Check “Enable Microsoft Entra Kerberos“.
- Leave all other fields blank (no hybrid configuration).
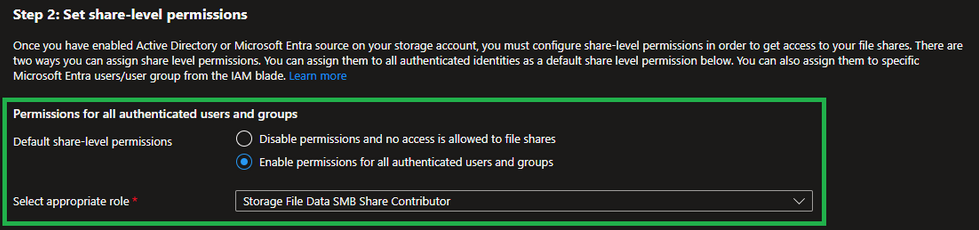
Step 2: Configure Default Share Level Permissions
Since Cloud‑only identities are limited to default share permissions during the preview, permissions are applied at the storage account level and affect all file shares.
For this demo, I am assigning:
- Storage File Data SMB Share Contributor
This provides read/write access to all authenticated users.
Step 3: Grant Admin Consent to the Azure Files App Registration
Enabling Entra Kerberos automatically creates an “App Registration” in your tenant. Granting admin consent is required for Kerberos authentication to function correctly.
- In the Azure portal, search for “App registrations“.
- Locate the app associated with your Azure Files storage account.

- Open the app and go to API permissions.
- Select “Grant admin consent for <your tenant>“.
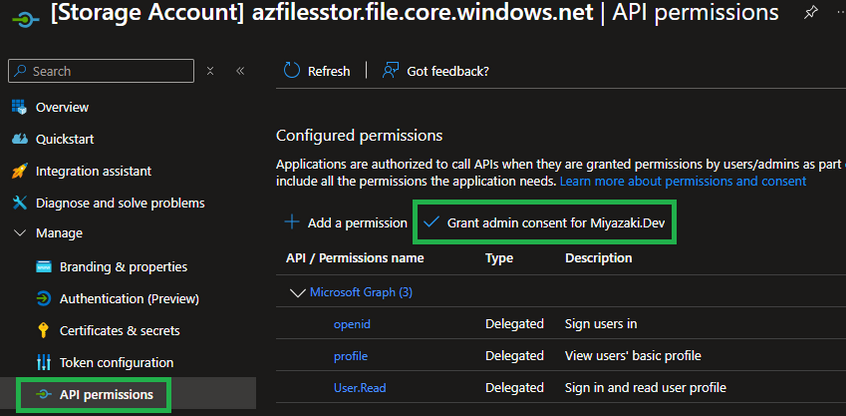
- Confirm when prompted.
Step 4: Update the App Registration Manifest
Next, we need to update the app registration manifest.
- From the app registration menu, open “Manifest“.
- Locate the tags section.
- Add the following entry:
"kdc_enabled_cloud_group_sids" 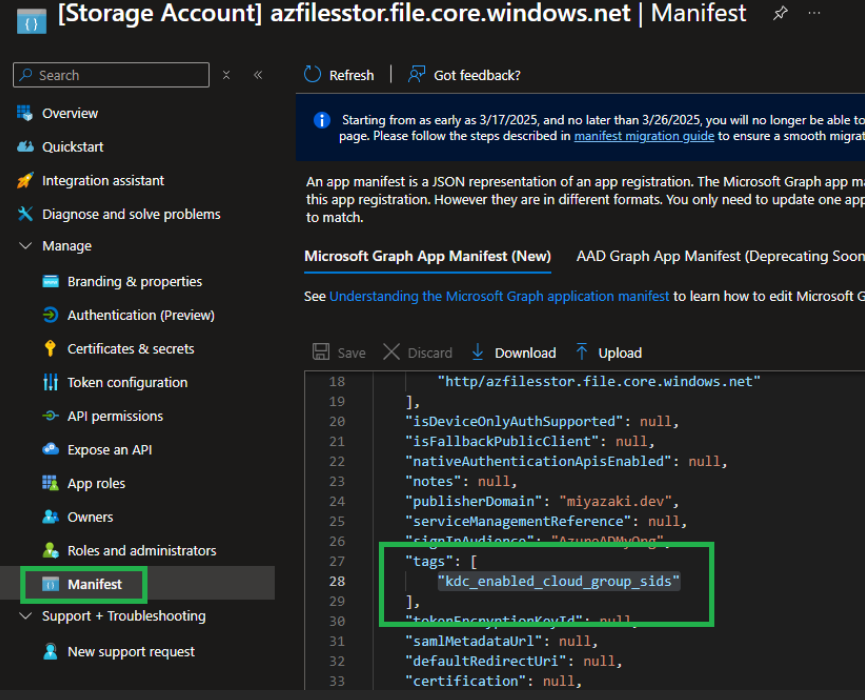
- Save the changes.
Step 5: Ensure MFA Is Not Enforced for the Storage Account
Microsoft Entra Kerberos does not support MFA for Azure Files access. If MFA is enforced, you may see errors when connecting to the file share like such:
System error 1327: Account restrictions are preventing this user from signing in
What to Check:
- Review Conditional Access policies that enforce MFA for all cloud apps.
- Add an exclusion for the Azure Storage resource or the specific storage account.
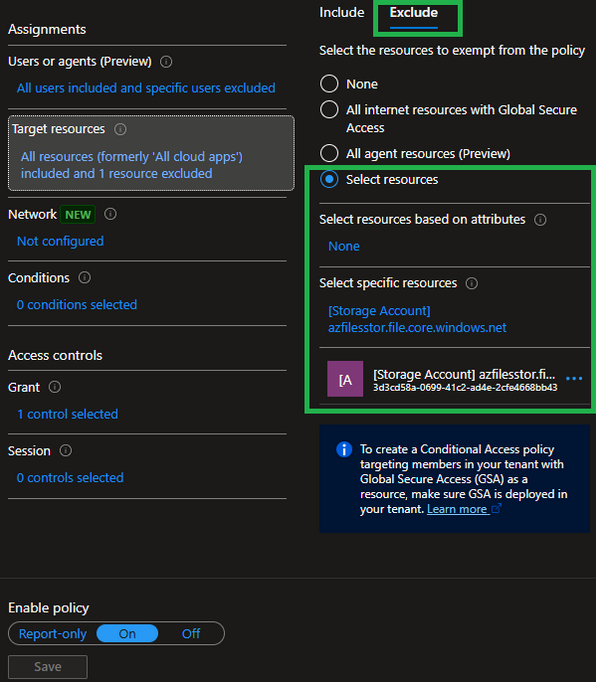
Each tenant’s Conditional Access setup is different, but the key goal is to ensure MFA is not required when accessing the file share.
Step 6: Configure Clients to Retrieve Kerberos Tickets
Clients must be explicitly configured to retrieve cloud Kerberos tickets. If this step is skipped, you’ll see a credential prompt followed by: System error 86 has occurred
Option A: Microsoft Intune (Recommended)
- Go to Devices ➜ Configuration profiles.
- Create a new profile:
- Platform: Windows 10 and later
- Profile type: Settings catalog
- Search for Kerberos.
- Add and Enable: Cloud Kerberos Ticket Retrieval Enabled
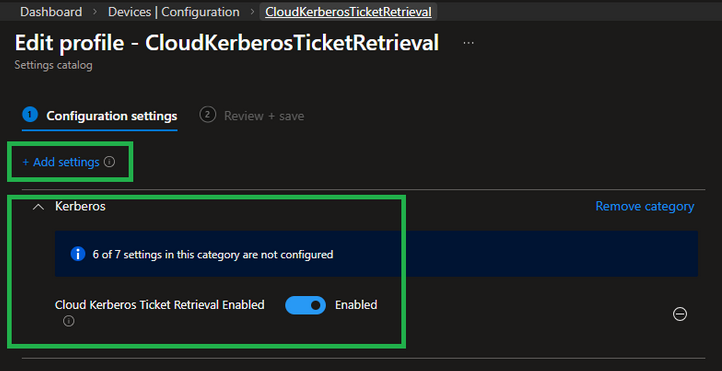
- Assign the profile to the appropriate users or devices.
Option B: PowerShell
For quick testing or running as part of a deployment script, you can run the following command on the client to add the necessary registry key:
reg add HKLM\SYSTEM\CurrentControlSet\Control\Lsa\Kerberos\Parameters /v CloudKerberosTicketRetrievalEnabled /t REG_DWORD /d 1 /fStep 7: Test Access to the File Share
Now we can test access to the share.
I ran the below PowerShell command to show that the device I am testing from is not joined to a domain and registered to my Entra tenant.
dsredcmd /status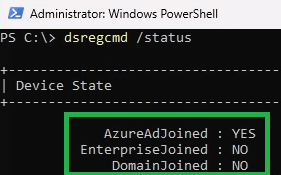
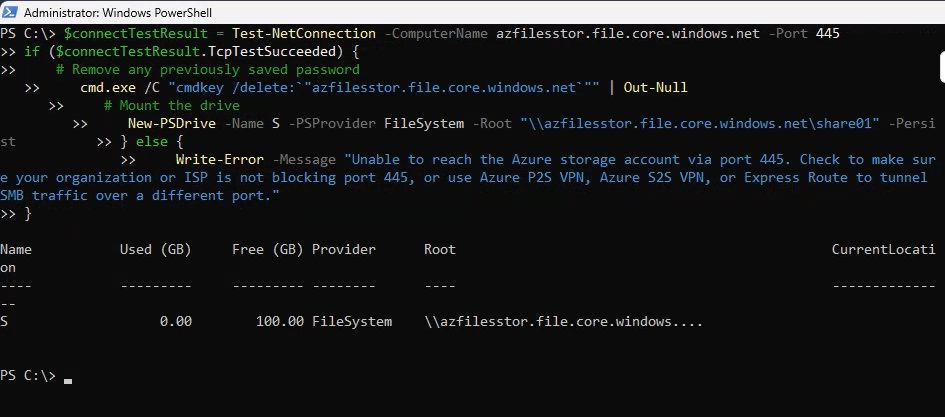
You can use the PowerShell script provided by the storage account to map the drive or map the drive via the “net use” command. In my test, I used the PowerShell script provided by the storage account and as we can see, I was able to successfully connect and access the share.

Troubleshooting Tips
When connecting to the share you should not be prompted for credentials.
If you run into issues while trying to connect here are a few helpful commands to diagnosis where the issue may be occuring.
Verify Entra ID Join Status
dsregcmd /status Confirm SMB Connectivity
Test-NetConnection <storageaccountname>.file.core.windows.net -Port 445 Validate Kerberos Ticket Retrieval
klist get cifs/<storageaccountname>.file.core.windows.net Final Thoughts
This is a feature I have been waiting for, for a very long time and it is great to finally see true cloud‑native Azure Files authentication becoming a reality.
While there are still limitations in the preview, especially around permissions, this is a huge step for modern identity‑first architectures.
If you’ve been holding back on Azure Files due to Windows Active Directory dependencies, now is a great time to start experimenting.
Until next time!